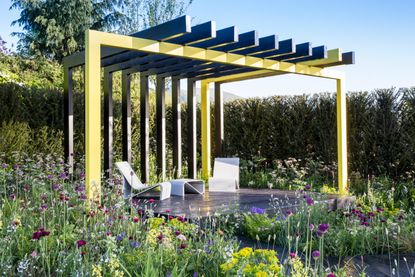

Most of the wooden structures in your backyard are made of pressure-treated wood. Fences, sheds, pergolas, decking - you name it. For some of us though, the natural wooden tones they typically come in don't fit our more vibrant landscaping ideas. For a more colorful and considered design, you might want to try painting the wood instead.
We've all seen painted sheds and fences, so it seems safe to assume that you can go ahead and paint pressure-treated wood, right? Well, here's the catch. Pressure-treated wood contains chemicals to help make it more durable, but those preservatives also leave the wood with higher levels of moisture which can lead to peeling paint. That means that painting pressure-treated wood properly requires a little extra know-how.
If you're hoping to paint your pergola, fence, or another structure made of pressure-treated lumber in your backyard, we've got you covered. We spoke with some paint and decorating experts who know a thing about achieving a professional-worthy paint job that withstands the elements. Here's what they had to say.
What is pressure-treated wood?

First of all, it's worth knowing what pressure-treated wood actually is before heading out with your paintbrush. In layman's terms, pressure-treated wood is a type of lumber that's undergone high pressure to inject a preservative into the wood. It's a process that extends the material's longevity, making it more durable so that it's suitable for use outside.
Most wooden materials in your modern garden will be pressure-treated unless they have natural properties that resist rot and decay. Western Red Cedar, for example, is considered one of the most durable woods as it has a natural resistance to moisture, meaning it doesn't have to be treated with preservatives. Pressure-treated wood isn't easily identifiable, but it typically has a slightly green or brown tint.
Should you paint pressure-treated wood?
Our colorful paint ideas needn't only be reserved for use inside our homes. Sometimes, a splash of color on our shed or fence is all that's needed to brighten up our outdoor spaces. The question is, is it safe to paint pressure-treated wood?
According to Christin Cieslarski, interior designer and decorating expert at My Homier Home, it is, 'however, it does require specific preparation and techniques to ensure the paint adheres to the surface and lasts long', she explains.
The main challenge when it comes to painting pressure-treated wood is that the chemical treatment preventing the wood from rotting makes it difficult for the paint to bond with the surface. 'Therefore, it's crucial to choose the right paint, prepare the wood correctly, and follow the recommended steps to paint pressure-treated wood,' Christin adds.
There's also another catch to bear in mind. Remember that high moisture content we mentioned earlier? Well, it's essential that you allow the lumber to dry out thoroughly before you paint it. 'It typically takes several months for pressure-treated wood to dry out and be ready for painting,' says Christin. 'If you paint it before it dries out completely, the moisture will cause the paint to bubble, crack, and peel.'
This means that you won't be able to paint brand-new wooden structures made of pressure-treated lumber for at least three months after buying it (and six months is more widely recommended).
What sort of paint should you use on pressure-treated wood?
When the time to paint finally rolls around, you want to make sure you're using a suitable finish for use outside. Like most outdoor projects, you'll need an exterior-grade paint, like an exterior-latex, that can withstand weather conditions. 'Additionally, it is essential to use a paint that is specifically formulated for pressure-treated wood to ensure it adheres correctly,' notes Christin.
While painting offers more options when it comes to color, some experts recommend using a stain and sealer product instead of paint in order to achieve the very best results.
'Staining pressure-treated wood provides penetrating protection that allows the natural beauty of the wood and wood texture to show through,' explains Brandon Poole, assistant product manager of exterior woodcare at Dutch Boy® Paints. 'These typically come in clear, transparent, semi-transparent and solid opacities and offer plenty of choices for customers to get beautiful, enhanced wood looks that last, with or without a hint of color. Using a solid color stain can also help extend the life of a deck, fence, siding, or outdoor furniture, too.'
$55.98
How to paint pressure-treated wood
Before you rush into taking a paint brush to your wood, you'll need to prepare the wood properly and know the best method of application. Read this quick-guide from the experts to find out.
1. Prepare the wood for painting
As is the case when painting a room, the first step is to clean the wood surface thoroughly to remove any dirt, dust, or debris. The best tool for this is a stiff brush. 'After cleaning, sand the wood surface lightly to create a smooth and even surface for painting,' says Christin.
Just as you would with your interior walls, you'll also want to go in with a coat of primer that corresponds to the paint you're using. This will help mask any imperfections and help the paint adhere. Brandon also suggests applying a stain for an extra layer of protection against mold and mildew.
$29.99
2. Apply the paint
Apply the paint using a high-quality brush or roller. Use your judgment on which application is best for the job at hand. For structures like fences or pergolas, a brush will be best whereas a high-pile roller will be better suited for large surface areas like sheds. Use two coats for the best coverage, allowing the recommended drying time in between according to the paint manufacturer's instructions.
3. Keep weather conditions in mind
Whenever you're painting outdoors, it's always important to keep the weather conditions in mind and check you're within the temperature range to paint outside. 'Avoid painting on days with high humidity, extreme temperatures, or windy conditions, as it can affect the paint's adhesion and quality,' explains Christin. If you're painting on a cold or overcast day, you should also be prepared for the paint to take a little longer to dry.
The good news is, adding paint, stain, or a sealant to pressure-treated wood can actually extend its life even further, so your outdoor structures will hopefully now stand the test of time. It's likely that the surface will need repainting every two to three years, however, so make sure to check its condition regularly.
-
What are the Most Comfortable Pillowcases? From Temperature Regulating to the Best for Your Skin
When you're looking for comfort in your pillowcases, material matters. These are the best you can buy
-
5 Simple, but Genius Bathroom Layout Tricks That Will Make Your Space Work so Much Harder
Small switches to how you lay out your bathroom that help make the most of a small space